I write about things I love to do in Las Vegas. If you click a link and make a purchase, I may receive a small commission, which helps to support my work. Learn more
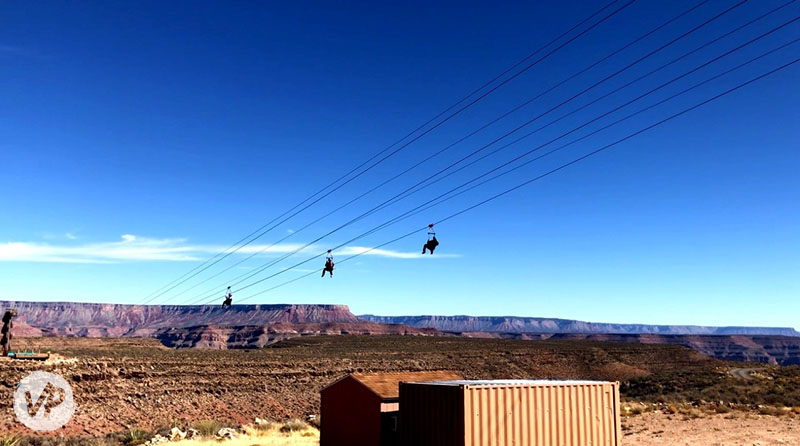
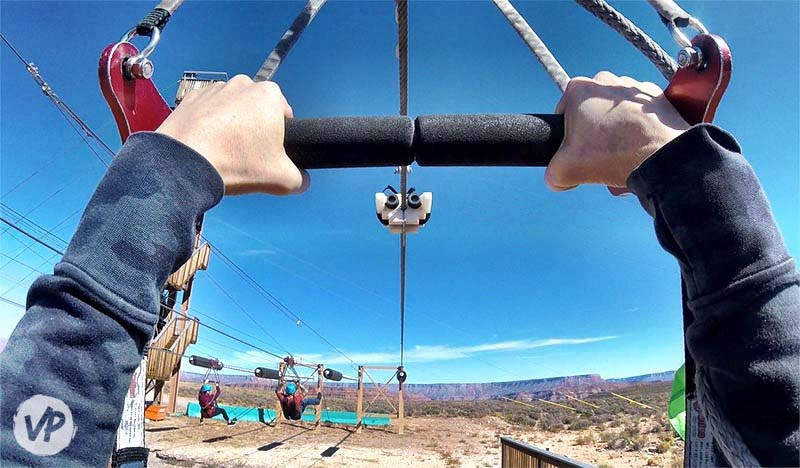
Have you ever wondered what it would be like to zipline at the Grand Canyon? Well, now you can! The zip line experience at Grand Canyon West allows guests to soar across side canyons – all while taking in breathtaking views.
It’s one of the tallest, longest, and fastest around. The experience also offers excellent value because you’ll get to go on two rides and take a canyon tour.
Now, I got to go a few months ago, and it was amazing. So I put together a review to show you what it’s like and share my best tips. Alright, enough with the intro; let’s fly!
Table of Contents[Hide][Show]
Video: See The Zip Lines
In this video, you’ll see what the zip lines are like and how fast you can go! I also share my favorite day-of tips and give you a preview of the canyon tour.
Getting There & Directions
The zipline experience is at Hualapai Point at Grand Canyon West. And if you’re driving there, you won’t need to go all the way to the Main Terminal. Instead, you’ll find the access road a couple of miles before the main entrance.
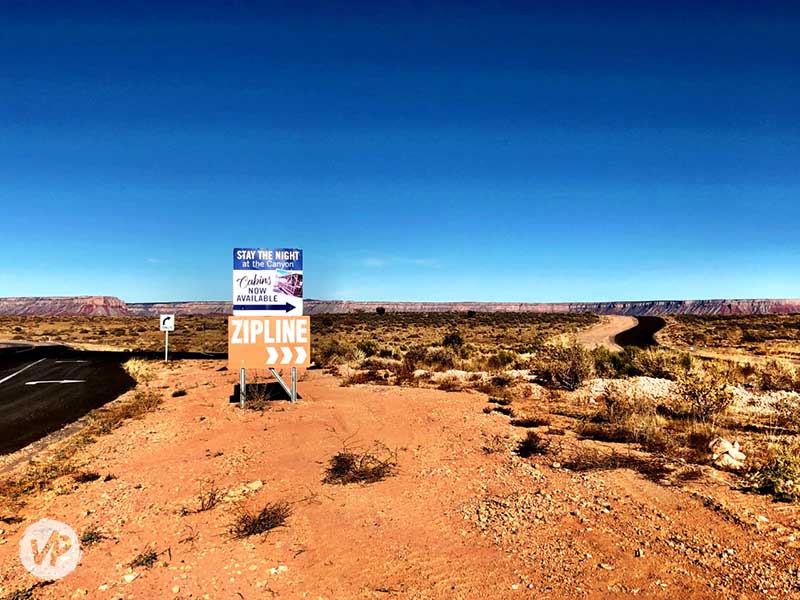
So from E Diamond Bar Rd, you’ll go through a roundabout and see a sign that says “Zipline next right.” Now, it’s not exactly the next right, as there are two back roads you’ll pass by, but it’s the next main road. Just look for the cabin signs, then turn right.
There’s ample and free parking at Hualapai Point, too. So once you’ve parked, you’ll show your tickets to the attendant on the footbridge and head to the check-in building.
Now, if you’re coming from the Main Terminal instead or don’t have a car, you can take the complimentary shuttle to Hualapai Point. But this will add some extra time to your day. So be sure to factor in at least 30 additional minutes of travel time when booking your tour.
Hours & Days Open
This experience was previously only open during the spring and summer. But thanks to high demand, Grand Canyon West has extended its season. So now you can ride the lines no matter which month you go!
2025 zip line Schedule
- Sat – Tues (January & February)
- Fri – Tues (March through December)
- Hours: 10:00 am – 5:00 pm
Tickets
Tickets are sold in one-hour intervals, i.e., 1:00 – 2:00 pm. This is again because the adventure isn’t just one ride. Instead, you’ll go on two runs and take a tour of Quartermaster Canyon. So the entire experience will take about 45 minutes to an hour.
Ticket prices can sometimes vary. But as of the date of this article, rates start around $45 per person. Sales tax is an additional charge.
Right now, there are seven tour times daily, starting at 10:00 am, with the last tour at 4:00 pm. Reservation times can sell out, too, so it’s best to get your tickets before going to Grand Canyon West.
Additionally, because there’s so much to see and do at the West Rim, it’s much better to have a schedule. But if you don’t book in advance, you can always go to Hualapai Point and check the availability there.
Passenger Requirements
There are a few passenger restrictions to keep in mind before buying a Grand Canyon zip line ticket.
- Minimum weight 90 lbs
- Maximum weight 275 lbs
- Must be at least 4 feet tall
- Must be able to climb stairs
- No pregnant women
- No persons with neck or back injuries
- No beverages or food allowed
- No smoking
- Must follow all guide instructions
Check-In
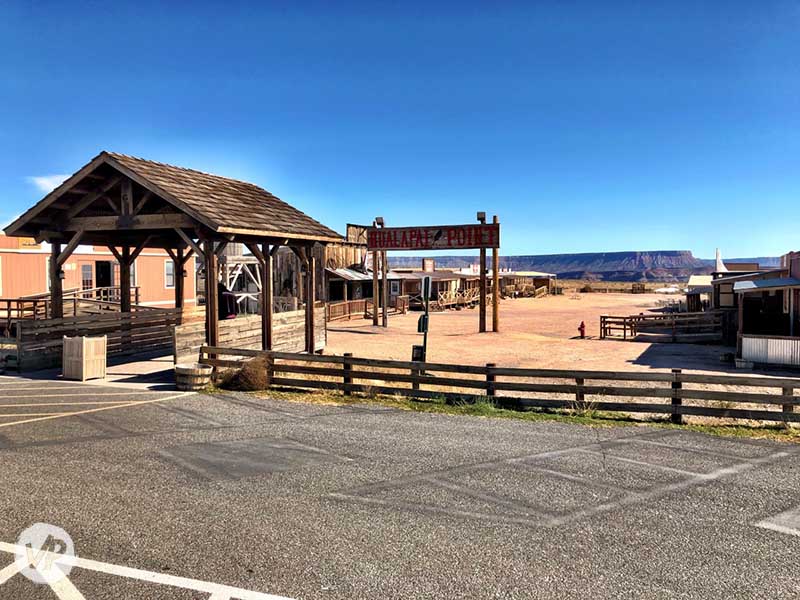
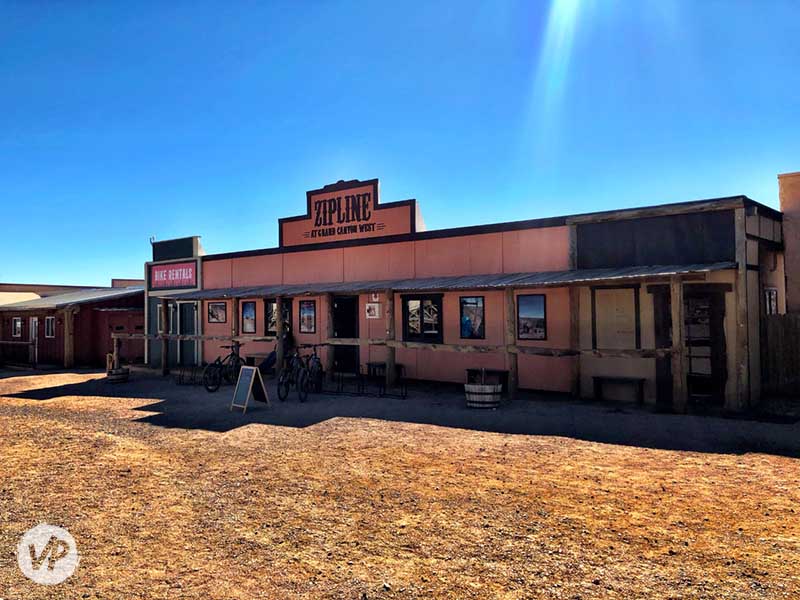
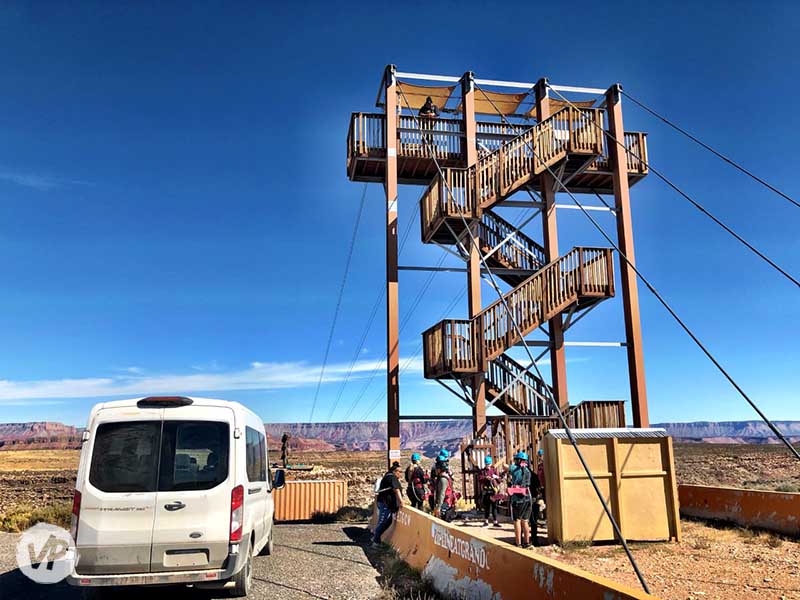
You’ll need to do a few things before you can ride the lines, so arriving 20 minutes before your tour time is best. Check-in is at the zip line building at Hualapai Point, and it’s easy to find. Just look for the peach-colored building with the big brown sign.
Inside, you’ll get your ticket scanned by a staff member and sign a waiver. Then, you’ll stand on a scale so that the team can assign you the appropriate harness.
Your weight isn’t announced – only the harness color, i.e., green, red, or black. So be sure to remember your color when it comes time to put your harness on.
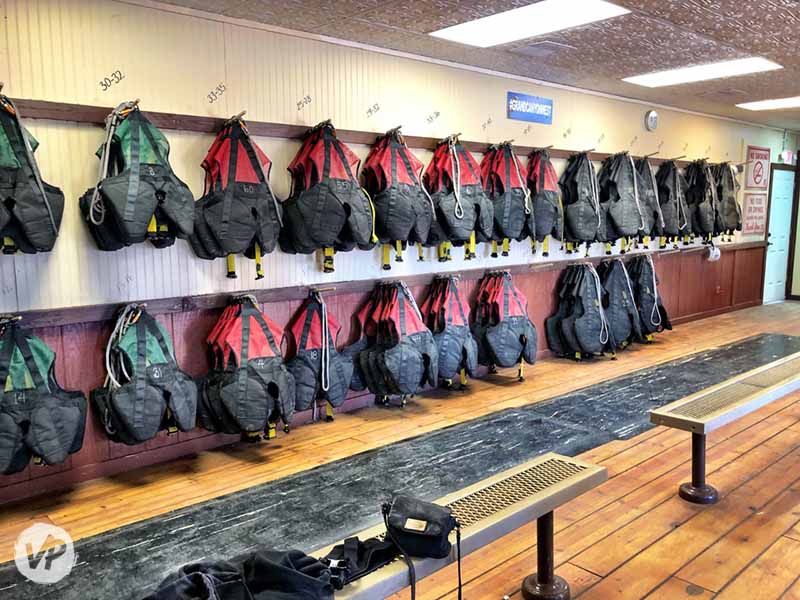
And then the last thing you’ll need to do before heading out on the shuttle is to grab a blue helmet from the wall. You can pick whichever one you want. The helmets are also sterilized after each use, so you won’t have to worry about germs.
Grand Canyon West Ziplines & Tour
Once you’re harnessed up, you’ll hop in a van with your tour guide to the first tower. You’ll grab a trolley there that you’ll keep with you for both runs. (If you’re new to riding, the trolley is the mechanism that sits on top of the cable.)
The trolley weighs about five pounds, and you’ll have to carry it up the towers. There are quite a few steps at each tower, too. For instance, Tower 1 has five flights of stairs, and Tower 2 has seven. But, if you need to, you can take your time and rest on the way up.
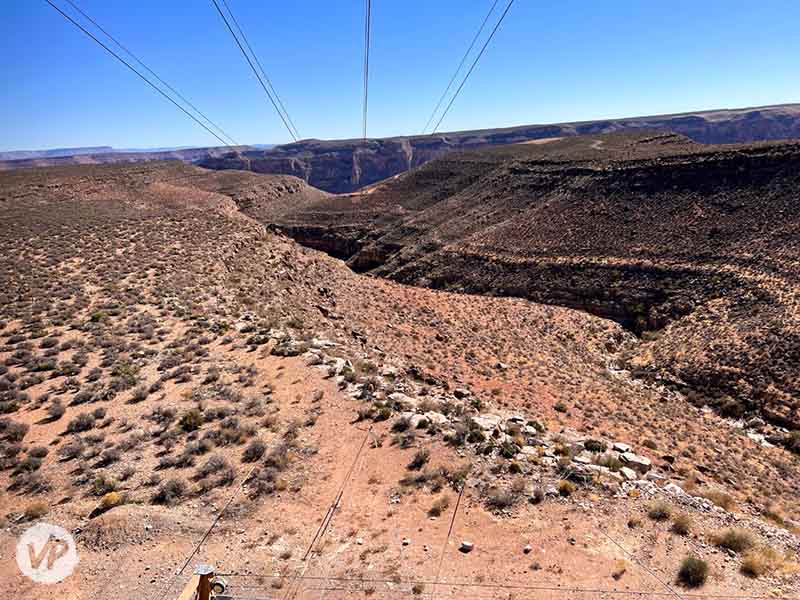
When it’s your turn to fly, you’ll step onto the tower deck and get hooked up. Each run has four lines so you can ride with your family and friends. And then each passenger gets released one at a time.
The more you weigh, the faster you’ll go, but you can speed yourself up or down based on your body positioning. For example, if you want to go faster, you can tuck your body like a cannonball. Or, to slow down, stretch out your arms and legs like a starfish.
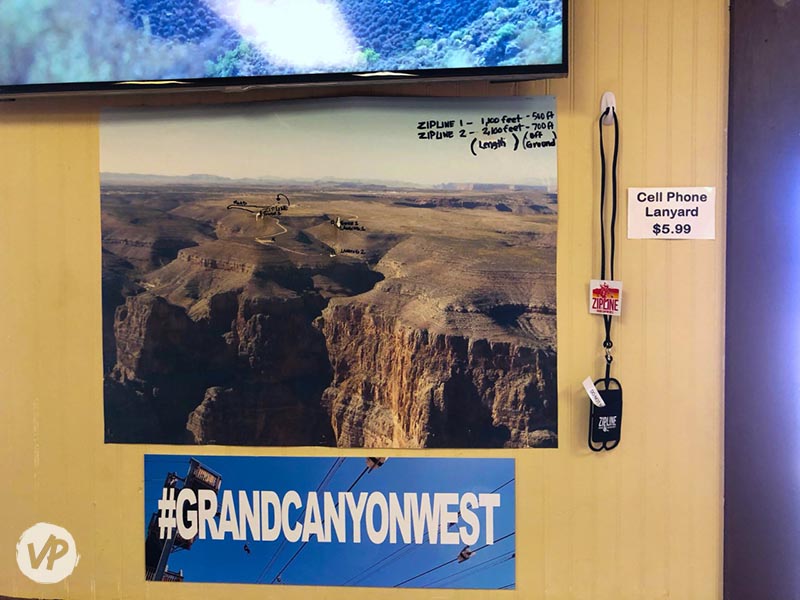
Ride #1
- 1100 feet long
- 500 feet off the ground
- 30 seconds of flying time
Ride #2
- 2100 feet long
- 700 feet off the ground
- 1 minute of flying time
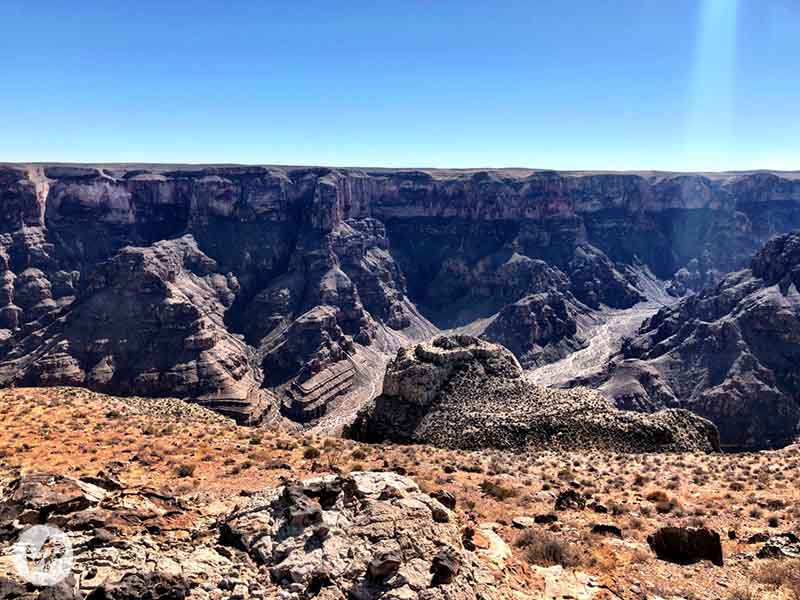
Quartermaster Canyon
After you’re done with the second run, you’ll follow the turtle and go on a short hike to the Quartermaster Canyon lookout. Before starting the trek, though, be sure to grab a complimentary bottle of water.
The hike doesn’t take too long – about five to 10 minutes, and it’s not too strenuous. But if you can’t do the hike, a team member can drive you to the viewpoint. The walk up to the canyon is beautiful, though. So if you can make it, it’s well worth it!

At the Quartermaster Canyon lookout, your guide will share some interesting facts – like how it’s two miles across and 3,700 feet deep. And you’ll get to hear how the canyon got its name from an expedition back in 1868.
You’ll also see shapes in the canyon, such as a bear and a princess with her horse. If you have trouble locating them, ask your guide for assistance. He’ll gladly point them out to you!
West Rim Native Plants
After taking in the view at Quartermaster Canyon, your tour isn’t over yet! As you ride back in the van to the building, your guide will point out vegetation along the way.
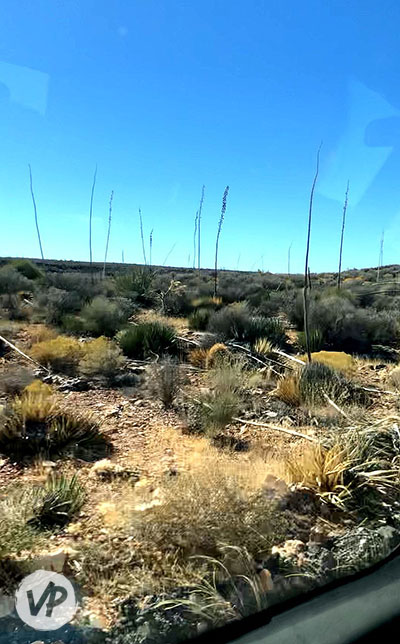
You’ll get to see a lot of unique plants. For instance, we found the Rubber Rabbitbrush plant particularly interesting as it was used as a rubber substitute during World War II.
And then there’s the Banana Yuccas, which are the primary source of nutrition for the canyon between May and August. This plant has a banana-shaped fruit (thus the name), but it cooks and eats like a potato.
Your guide may also dispel some cactus myths that could come in handy – if you’re ever lost in the desert. And show you which plants were used for bandages and sewing needles.
But a surprise comes at the end when you get to see the dirt road that Robbie Knievel used to jump the Canyon in 1999!
Things To Know Before You Go
I always like knowing what to expect, so I’ve put together a list of the things we wish we would’ve known before we went. I hope these tips will help you have a stress-free and enjoyable adventure!
GoPro Cameras
If you want to record your experience, you can bring a GoPro camera or rent one at the check-in building.
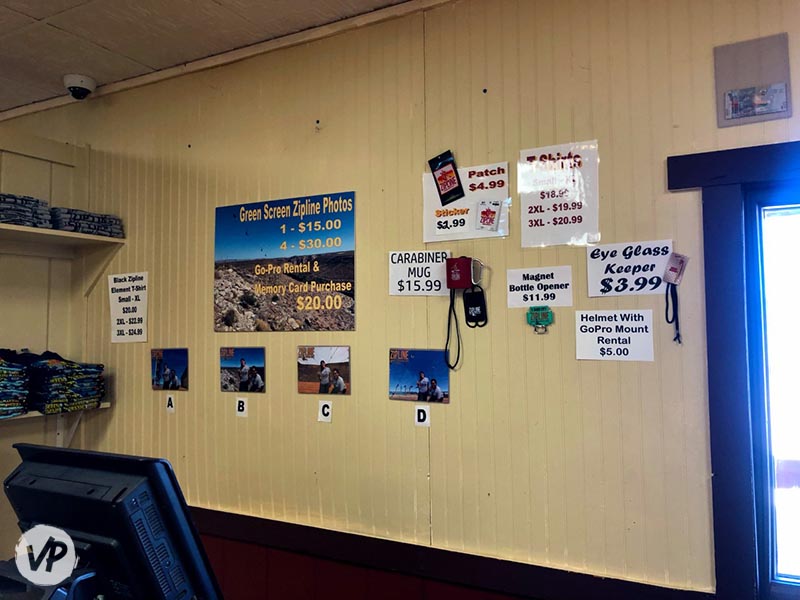
Now, if you’re bringing your own, you can rent a special helmet for around $5.00. This helmet has a mount for your GoPro. But I recommend bringing your GoPro accessories, too, because we had some trouble getting the camera on.
We’re not the most skilled GoPro users, though, as it was our first time. But we think it would’ve worked had we had the proper mounting accessories.
So, we ended up using our GoPro Head Strap instead. We bought this at a local retailer for around $20 before we went to Grand Canyon West. This worked very well! It didn’t move on the lines, and the video we captured was unobstructed.
If you don’t have a GoPro or prefer not to bring yours, you can rent a camera. And you’ll get a memory card to take home with you, too. When we visited, it was only $20 for the GoPro rental and memory card purchase. We thought this was an excellent deal!
Photos
On the tour, you’re also welcome to take as many photos on your cell phone as you’d like. But you’ll need a way to secure your phone while riding.
We had brought a waist pouch to keep our phone safe, but we couldn’t get to it with all the equipment on. So we got a cell phone lanyard at the building instead. The lanyard goes around your neck and keeps your phone safe with its straps.
But you may want to make sure that the lanyard fits your phone before buying it – especially if you have one of the newer iPhones. With these, a lanyard strap may obstruct one of the three lenses, creating a black spot on your photos.
This happened to us a few times. However, once we knew about the issue, we checked the straps before taking a picture to ensure they weren’t covering a lens. And then we didn’t have any further problems.
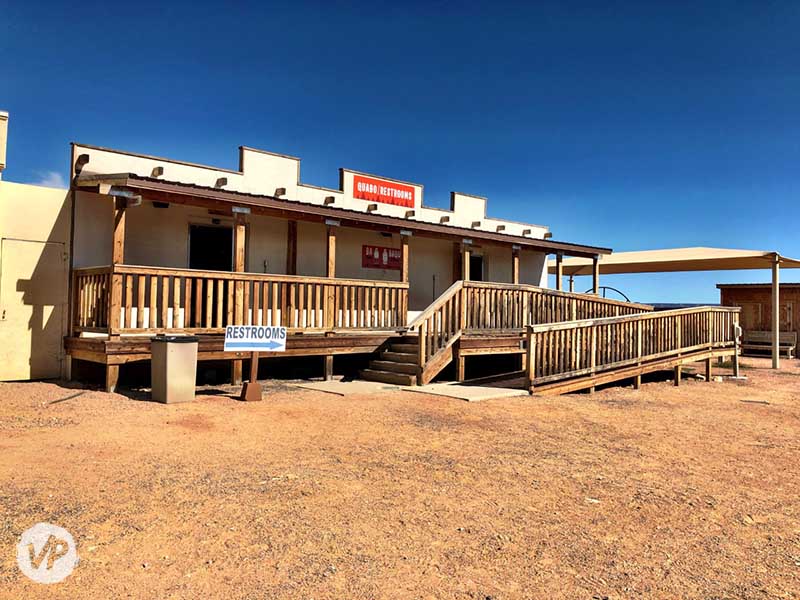
Restrooms
Since your tour will take anywhere from 45 minutes to an hour, you may want to stop at the restrooms first. The public loos are not in the zip line building, though.
Instead, you’ll need to exit the building and turn right. You’ll find the restrooms inside the last structure on the left at the end of Hualapai Point. It’s only about a minute’s walk, and it’s easy to find – just look for the Quado/Restroom sign.
Lockers
It’s not a problem if you need to bring a lot of stuff to Hualapai Point. And that’s because there are complimentary lockers available for zip line guests.
The lockers are big, too, so you can pack everything in one space. And you’ll get a key to take with you on the tour. Now, it’s a good idea to store items here that you won’t need to access. So, for example, purses, hats, outside food and drink, and any extra clothing.
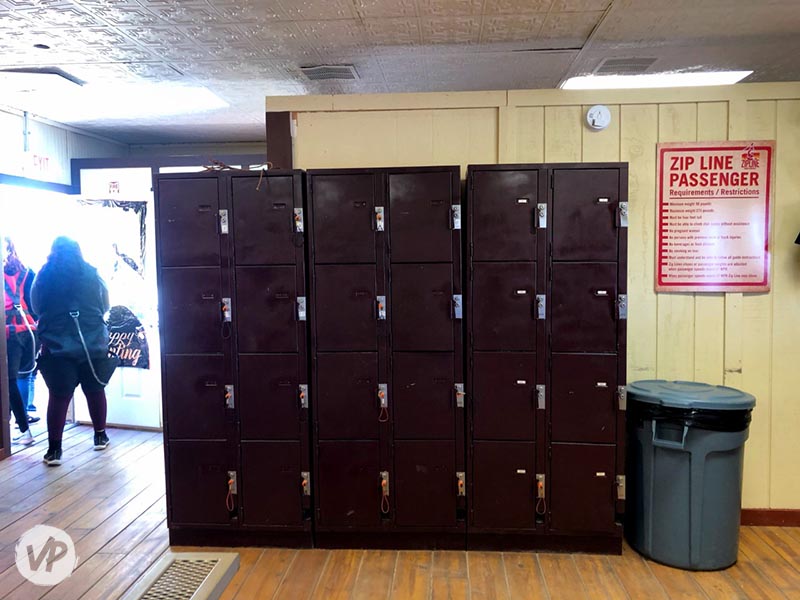
The only items I recommend bringing with you are a cell phone or GoPro camera – if you’re recording the experience. As for sunglasses, I don’t remember anyone in our group having them on, but you’re welcome to wear them at your own risk.
Souvenirs
For those that love getting souvenirs, there’s lots of fantastic merch! For instance, Grand Canyon’s zipline t-shirts start at $20, and there’s a wide selection of sizes too. And then there are also mugs, patches, stickers, bottle openers, and green screen photos.
If you wear glasses, you can even get a special eyeglass keeper to take with you on the tour. And, of course, the most popular item is the cell phone lanyard. I highly recommend getting that!
Scheduling Your Day
If you’re driving to Grand Canyon West, booking the zip line tour as your first experience works well. This is because you can go directly to Hualapai Point and park your car there. The access road is before the main entrance, too, so you’ll save travel time going here first.
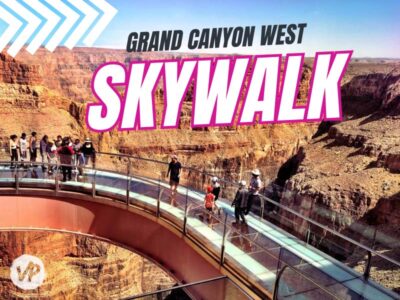
And then, after you’re done with the lines, you can continue driving down the road to the Main Terminal. From there, you can go on the Skywalk or explore more of the Grand Canyon at Guano Point.
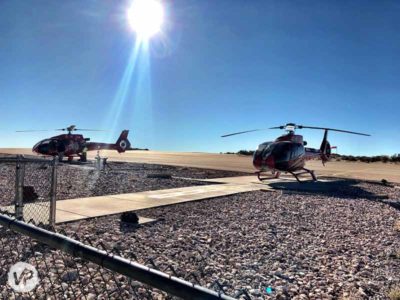
If you’re interested in the Helicopter and Pontoon tour, I recommend booking this at least two hours after your zipline start time. This should allow enough time to get back to the main entrance and check-in for your flight.
Zipline Safety Measures
If you’re a first-timer or nervous about going, the staff is there to help ease your mind.
Our guide explained all the safety measures they had in place when we went. For instance, there are daily, weekly, monthly, and annual inspections of the lines. And, of course, servicing of the brake systems, too. The team even goes on the runs each morning before they open.
On top of the towers are checklists to ensure guests are hooked up correctly before each ride. Additionally, only one guest can walk on the tower deck at a time. So you’re always getting the undivided attention of a team member.
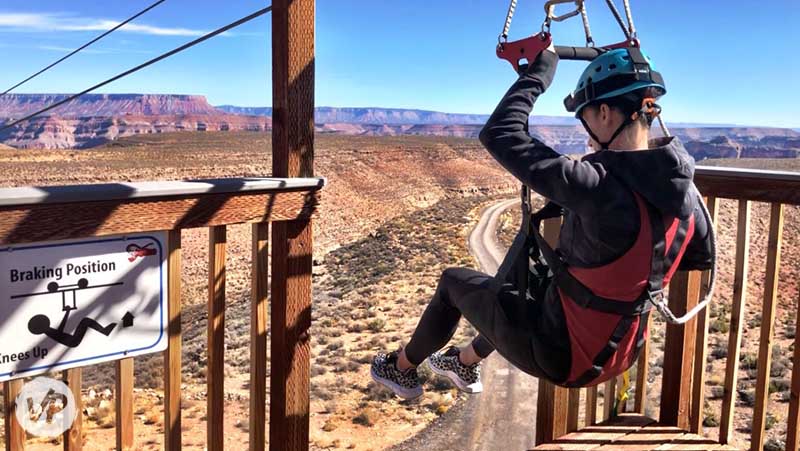
Braking
With all the excitement, we should have paid more attention to the braking instructions! So I want to point them out to you now so you don’t experience a big jolt at the end of each run.
There should be a team member at the end of each line that will tell you when to start braking. But if you don’t hear him, it’s important to remember to brake 20 to 30 feet out.
You’ll need to lean back with your knees up to get into your braking position. And be sure to keep your knees and feet shoulder-width apart. This position should slow you down enough, so you’re not hitting the stops at full speed.
Conclusion
The Grand Canyon West zipline is an incredible attraction! I can’t imagine any ride more beautiful and thrilling than this. And the tour and view of Quartermaster Canyon blew my mind.
Now, I’ll admit we had some nerves. But the fears quickly subsided once we spoke with the staff and heard all the safety measures they had in place.
We were also super impressed with the entire team. And two staff members, John and Delaney, went above and beyond to make our time there fantastic. They were friendly and professional, offered helpful insights, and answered all our questions.
Overall, this adventure far exceeded our expectations, and it was an unforgettable day. So, if you’re on the fence about going, GO. I think you’ll love it!